4 - ArduRover Setup
We used the ArduRover Setup Guide to help us assemble our components. The instructions were fairly straightforward, however we deviated slightly. Bebop only needed to be in either of two modes at any given time for the competition: (1) Manual Mode, where we used the transmitter to drive it; or (2) Automatic Mode, where we commanded it to start running the pre-set mission. We didn't use Learning Mode; and we did away with the Clear Waypoints, Set Waypoint, and Return to Launch (RTL) functions.
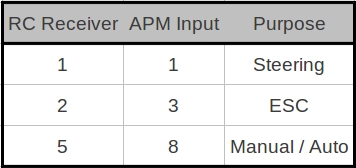
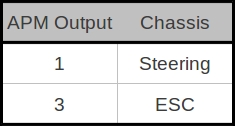
Our connections were as follows:
Our connections were as follows:
|
|
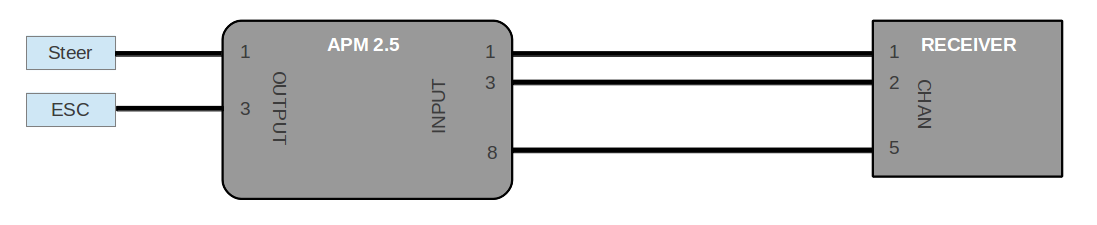
We connected the GPS, Power Module, and Telemetry components to their marked ports on the ArduPilot Mega board. For simplicity, these are omitted from the diagram below.
Once all of the physical connections were made, we installed the Mission Planner software onto a laptop and continued from the "Loading the code" section from the ArduRover Setup Guide. Since we did not attach a sonar sensor, we left the 'Enable' check-box unmarked in the Configuration > Hardware Options menu.
The transmitter's menu system allows you to assign the input controls to various channels. Unfortunately, our Turnigy transmitter didn't ship with documentation, so we had to discover this process for ourselves. To assign an input control to channel 5 (CH5), do the following:
1 - Ensure that all of the toggle buttons are flipped up and away from you. Then, turn on the transmitter.
2 - While at the home screen (with the Turnigy logo), press and hold the MENU button until the menu appears. There will be two large icons: (1) a transmitter icon for the system settings; and (2) a wrench/screwdriver icon for the function settings.
3 - Press the DN (Down) button to highlight the wrench/screwdriver icon and then press MENU. This will bring you to a lengthy function settings menu.
4 - Press the UP button to highlight the very last item on page 2: [AUX - CH]. Then press MENU. The first item lists CH5's associated input.
5 - To change the input assignment, use the + or - buttons. We set this value to 'GEAR.'
6 - Once all changes are complete, press MENU to save the settings. If you press EXIT instead, the setting will not be saved! Pressing MENU will save the setting and return you to the previous menu.
7 - Press EXIT twice to return to the home screen.
You can assign CH5 to some other value if you choose. This just means you'll be using a different input control than we did. We found it helpful to use the Configuration > Radio Calibration mode in the Mission Planner to find a switch that worked for us. If you have a servo, you can attach it to the various channel ports on the receiver to identify and confirm the controls assigned to the transmitter. We settled on the two-way toggle switch so we could flip between Automatic and Manual modes. Because of how the Configuration > Flight Modes menu was configured, Manual Mode was active when the switch was flipped away from us, and Automatic Mode was active when the switch was flipped towards us.
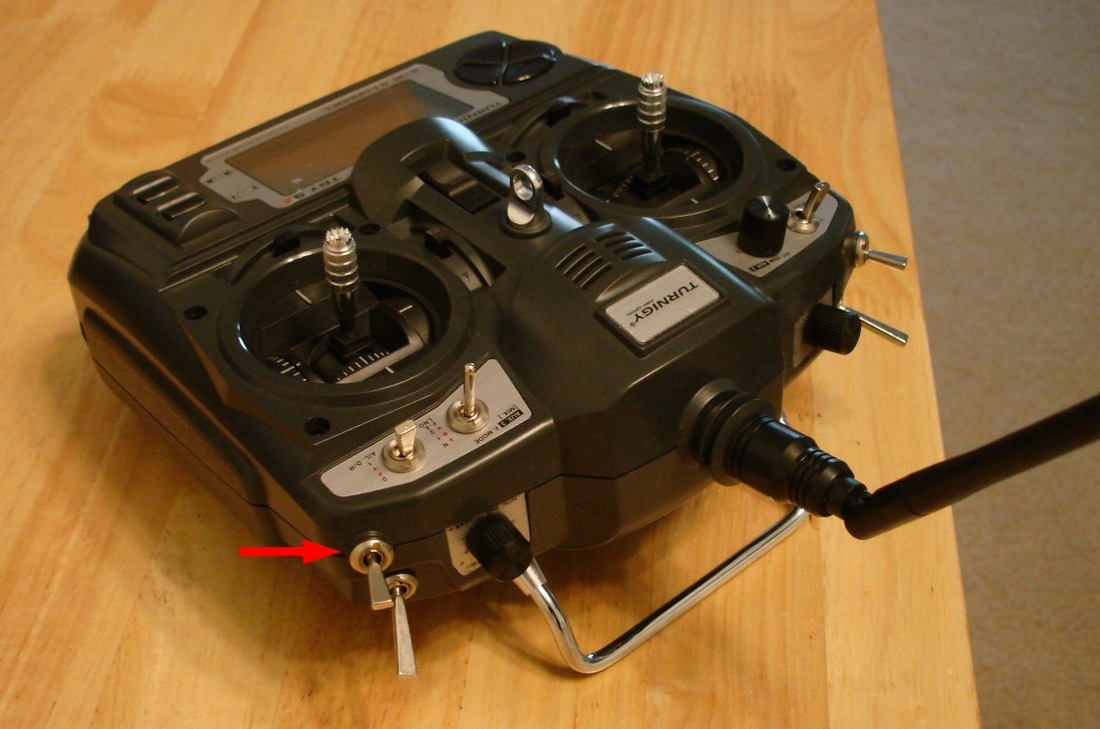
The 'GEAR' switch is on the top right-hand-side of the transmitter.
Last Update: 30 November 2013